


I’ve been making travel boxes for many years. While packing to catch a plane to go on vacation, I grab one of my boxes to throw into my backpack and race to the airport. These boxes contain everything I need to survive in the sketching wilderness. I carefully fit each sketchbook, watercolor box, inkwell, brush and drawing tools into the smallest most efficient space.
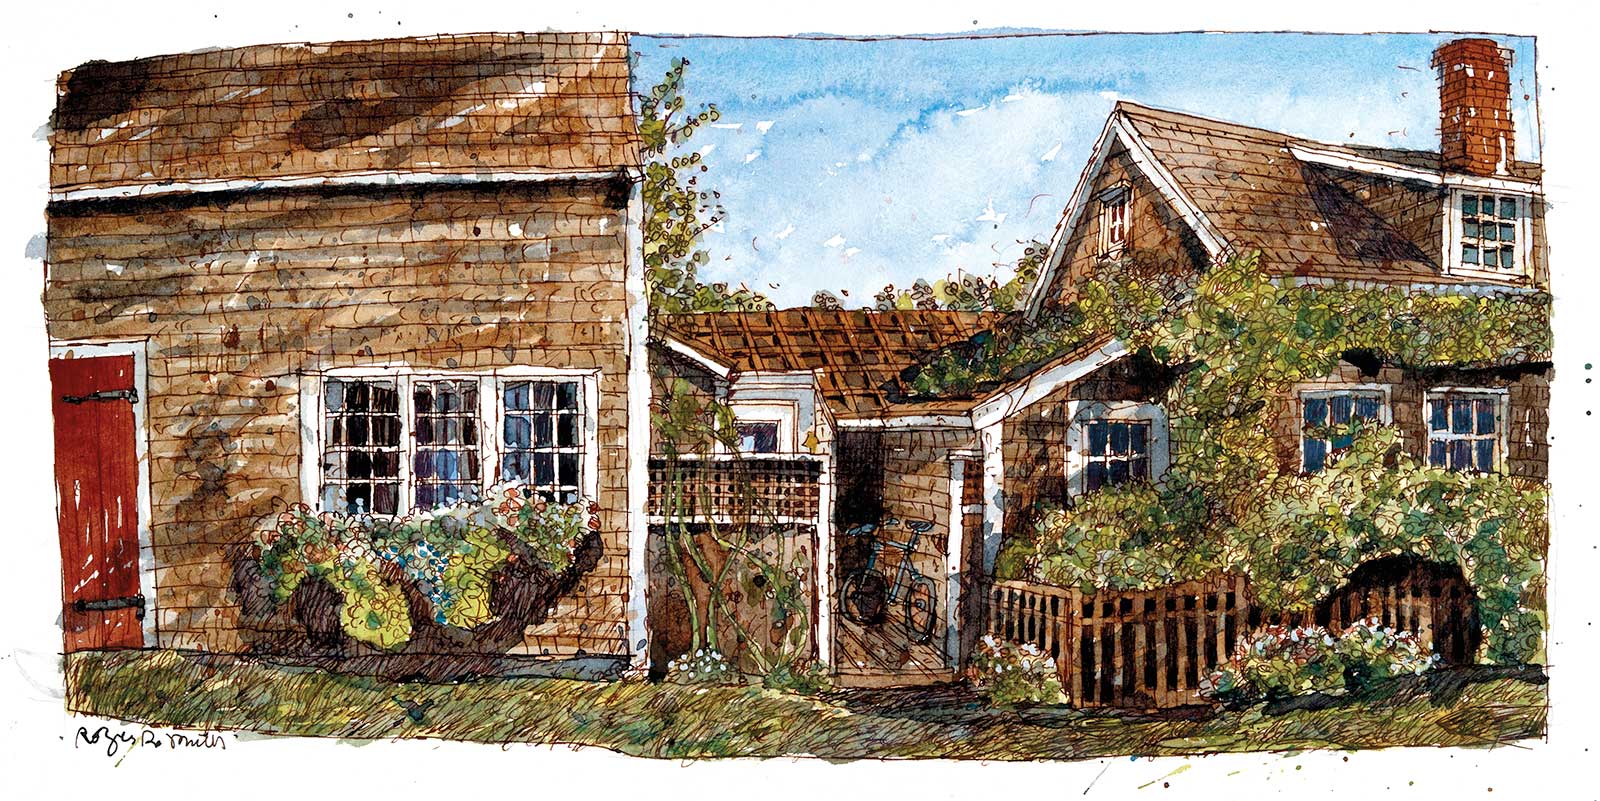
A watercolor painting from Roger De Muth’s sketchbook.
Quite often I make the watercolor box out of a flea market purchase or a plastic box from a craft store. Some of the boxes are simply lightweight plastic craft boxes which I’ve fitted my inkwell through the top and made dividers for the interior space.
The boxes eliminate a last minute trip to the art supply store before heading out to a meeting, lecture or on vacation and have everything needed to sketch, ink or paint my art on location.
I use the motto “have watercolors, will travel” and have worked for many, many years living up to it. Documenting the trip in watercolors, sketching during meetings or while traveling on the train can be quite a rewarding experience. Having a small sketchbook filled with memories of a trip will last a lifetime.
Here’s how I make my travel watercolor boxes.
While the supplies seen here pertain to my watercolor practice, these organizational tools and methods can be applied to suit a variety of mediums.
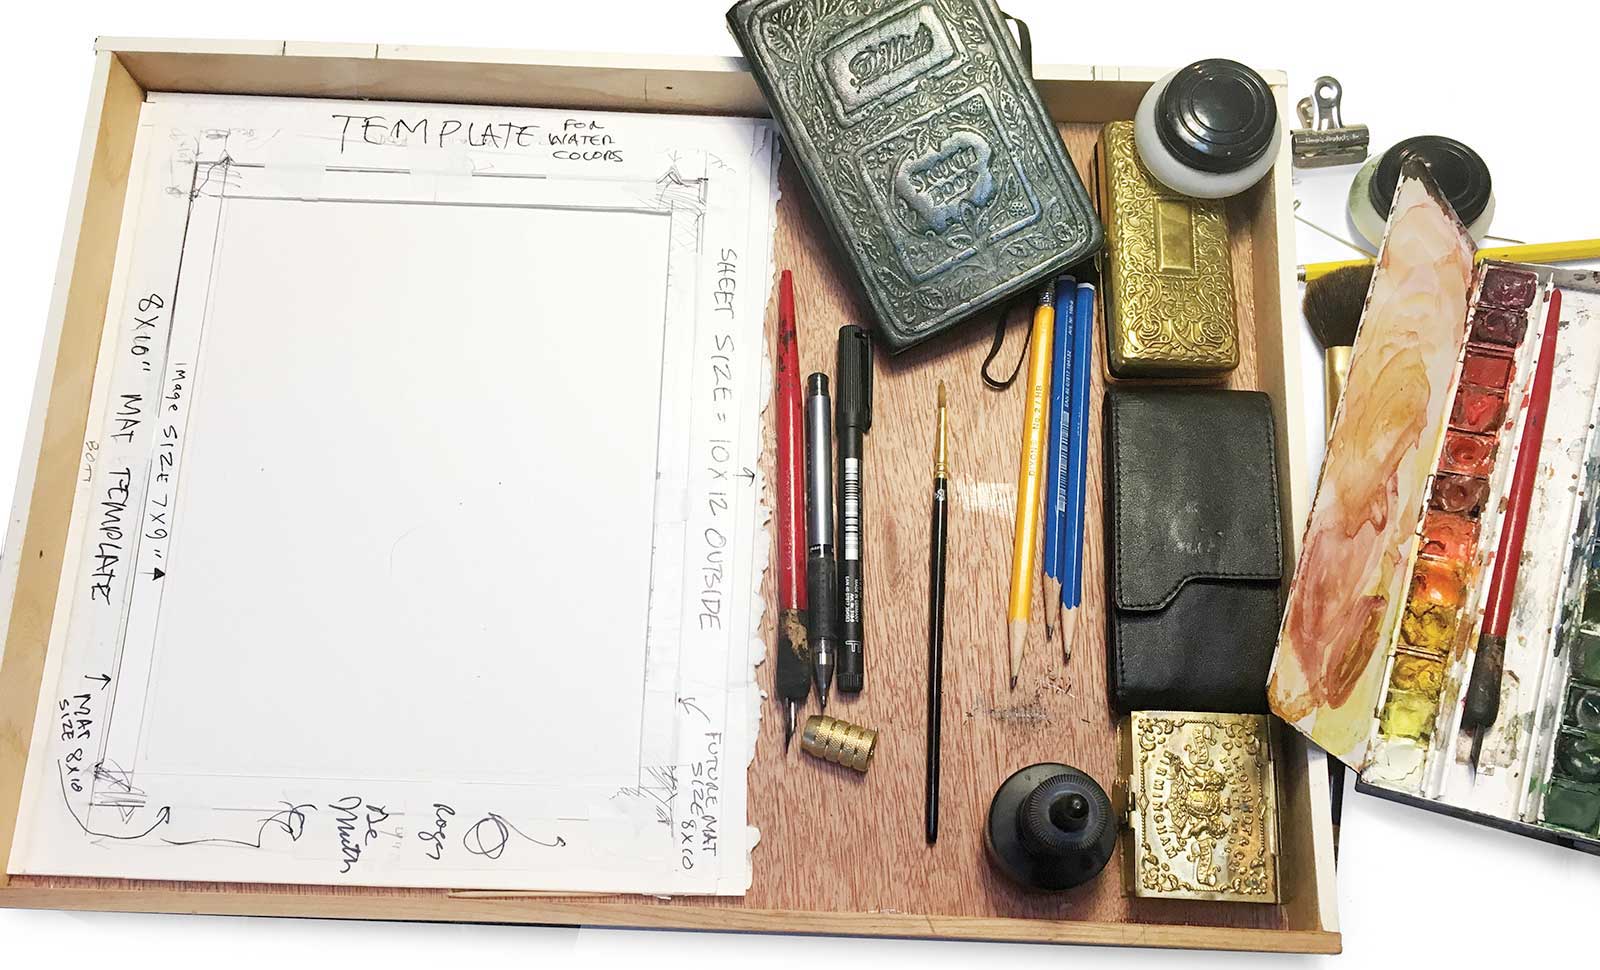
Gathering All Supplies
I begin by assembling all my art supplies into a box I’ve made of hobby plywood or heavyweight chipboard. Chipboard is the backing material used while matting watercolors. I decide which materials are most important to take with me and which to leave out. At this point, I’ve settled on a box size, and a rough position of the materials and paint box.
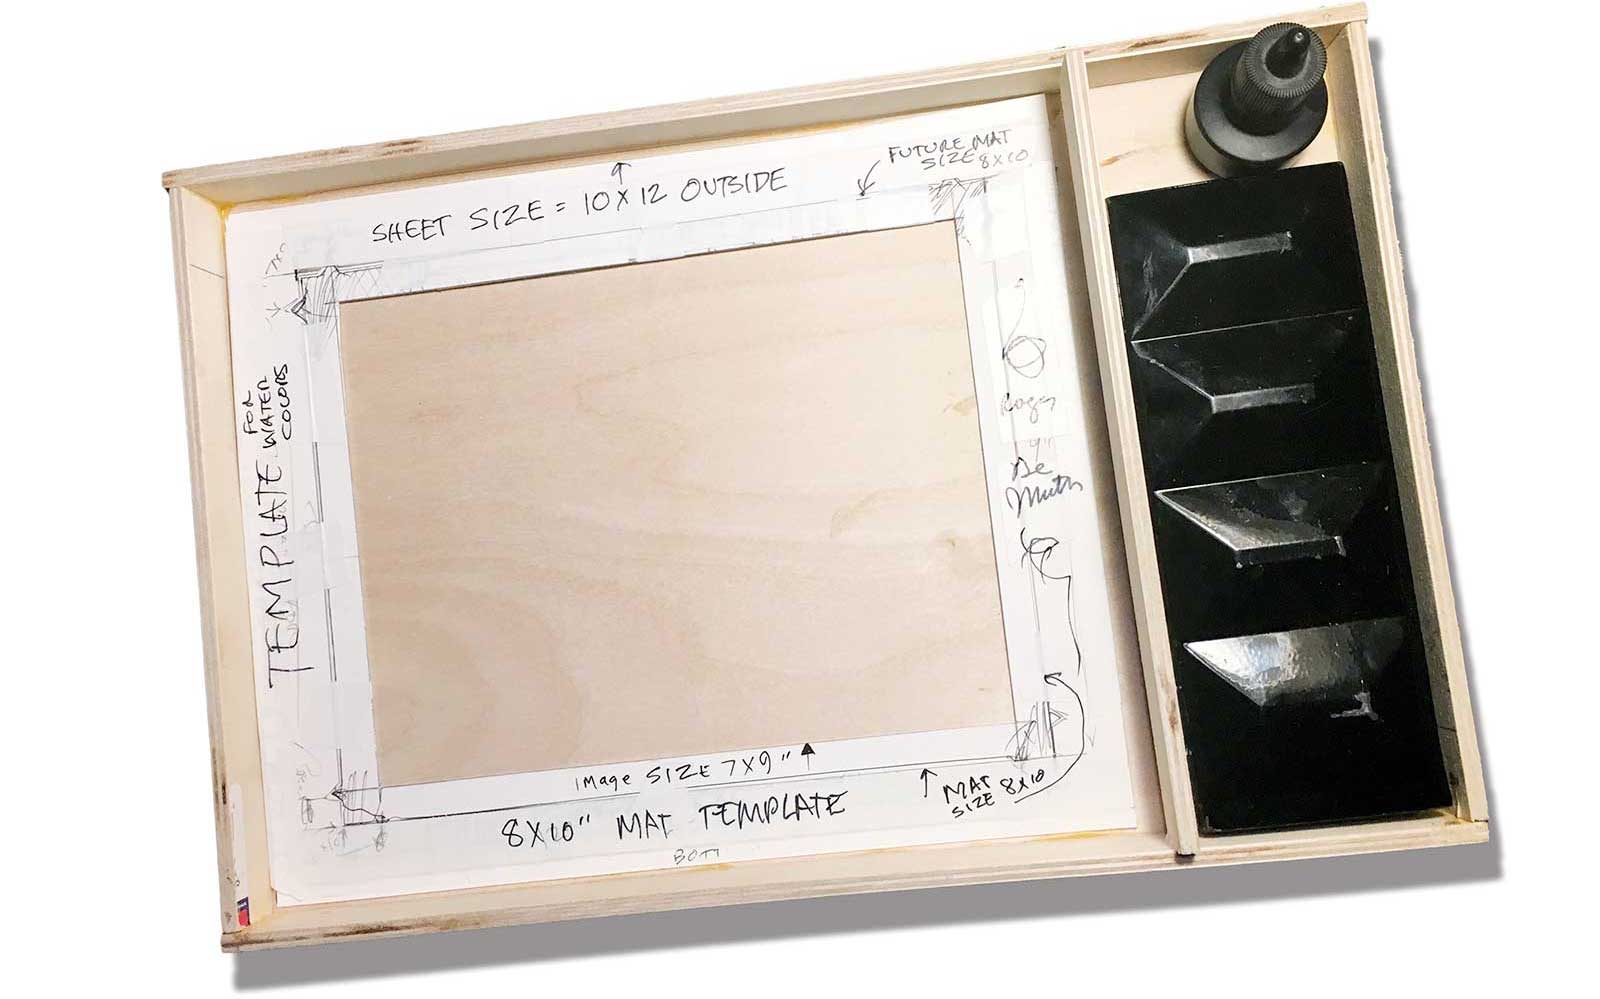
Box Configuration
The layout is now established. The major objects are in position and will work nicely together. My Winsor & Newton metal watercolor box fits snugly on the right side just below my Higgins waterproof India ink bottle. The 8-by-10-inch template on the left will be handy to give me an idea where the mat will fall while I’m drawing and painting. I can put a half dozen sheets of Arches paper under the template, and above the drawing tools, pencils, sketchbook and dip pens on the left side of the box.
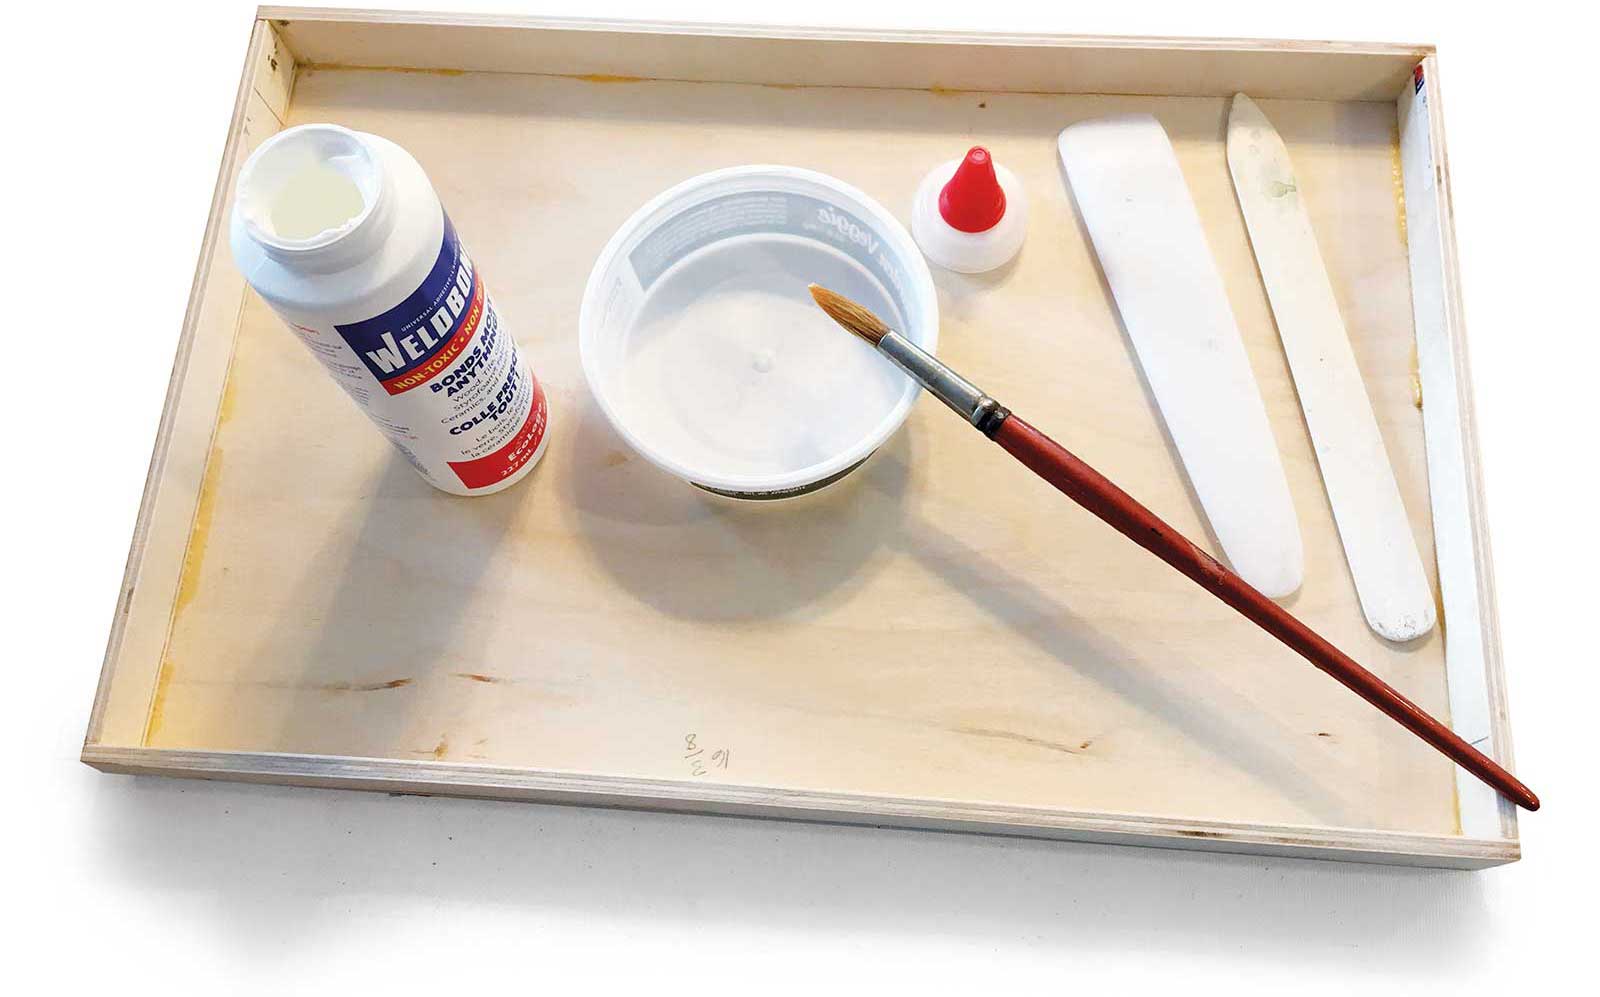
Gluing
I use a Weldbond waterproof glue mixed with a small bit of water to spread on the canvas while I’m wrapping the box. I use bone folders to crease the canvas to make the joints nice and sharp. The very thin plywood is available at hobby shops and hardware stores. Once it’s glued together, it becomes quite strong. On smaller boxes, I use triple weight chipboard available at most art supply stores.
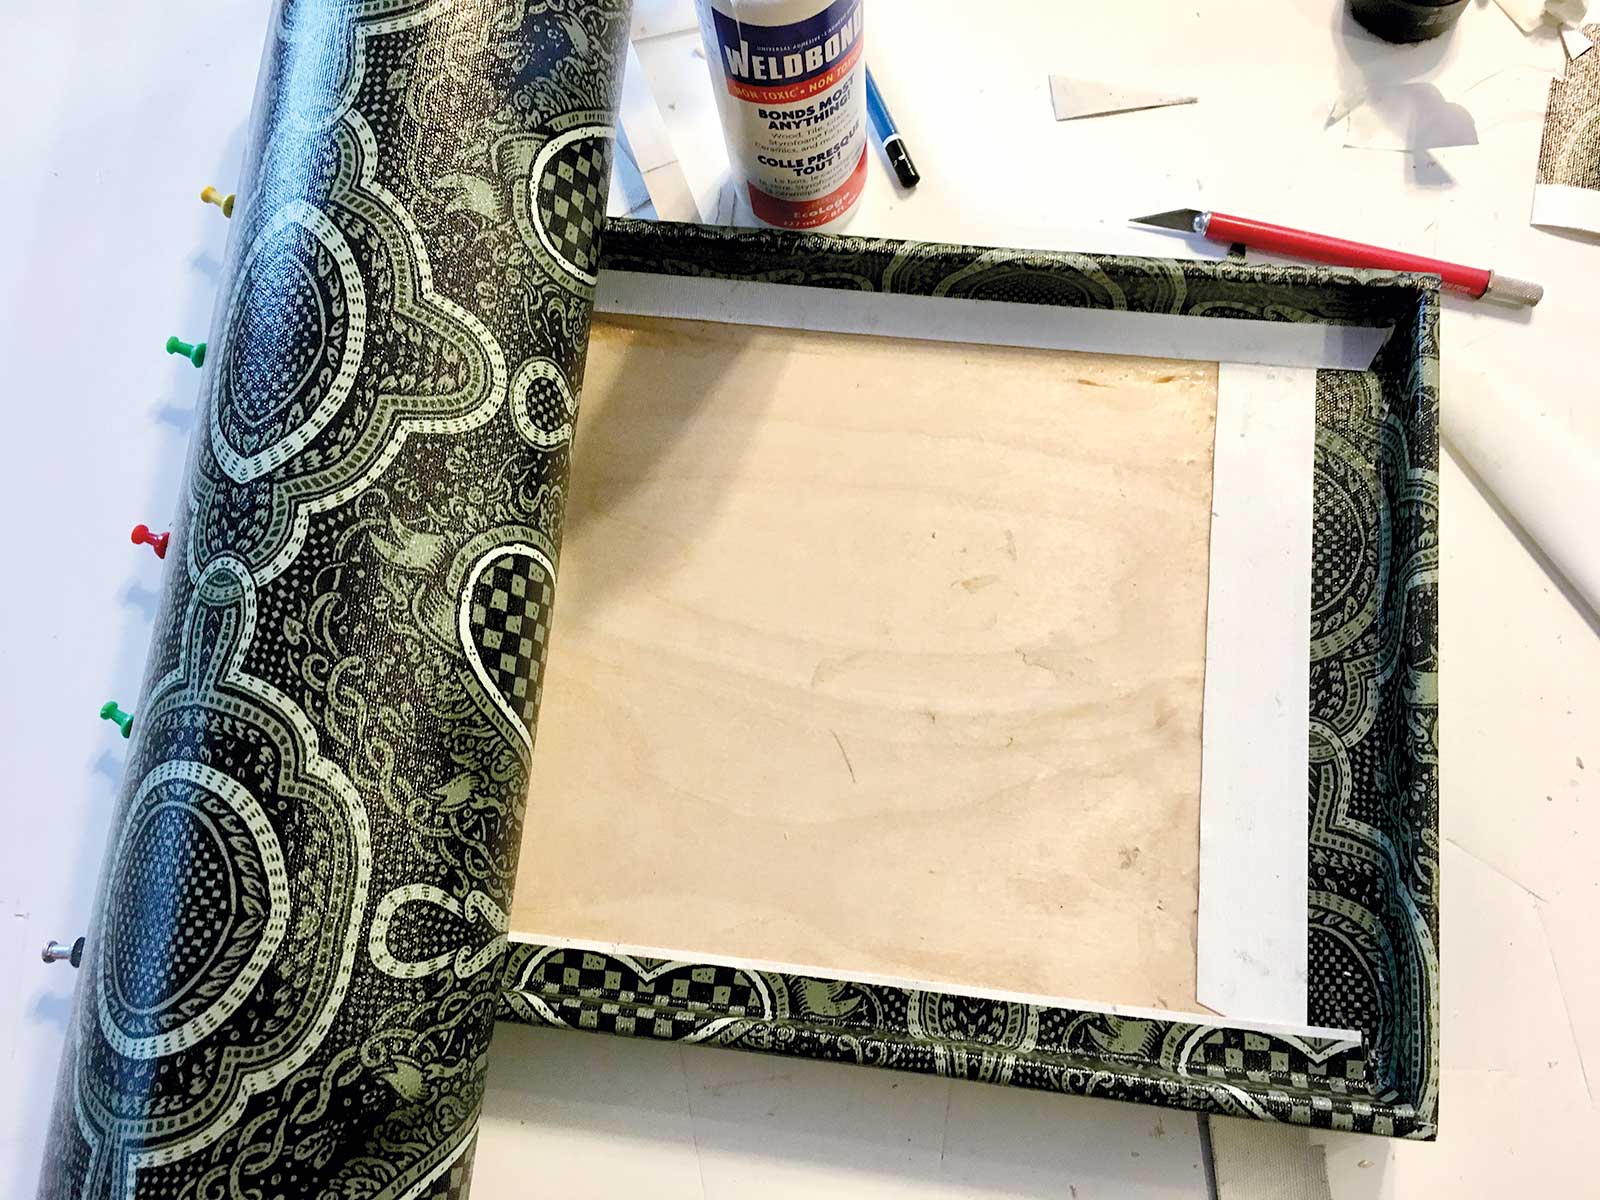
Covering the Box
I printed several large sheets of patterned canvas that I designed. After the canvas was printed, I gave it a coat of Crystal Clear spray varnish to further protect the design. As the canvas is wrapped around the outside of the box, I hold it in place with artist’s tape and push pins (left side) while it dries. The canvas is printed on an Epson SureColor P5000 using Epson Gloss canvas on the roll printer. You might also use bookbinders cloth.
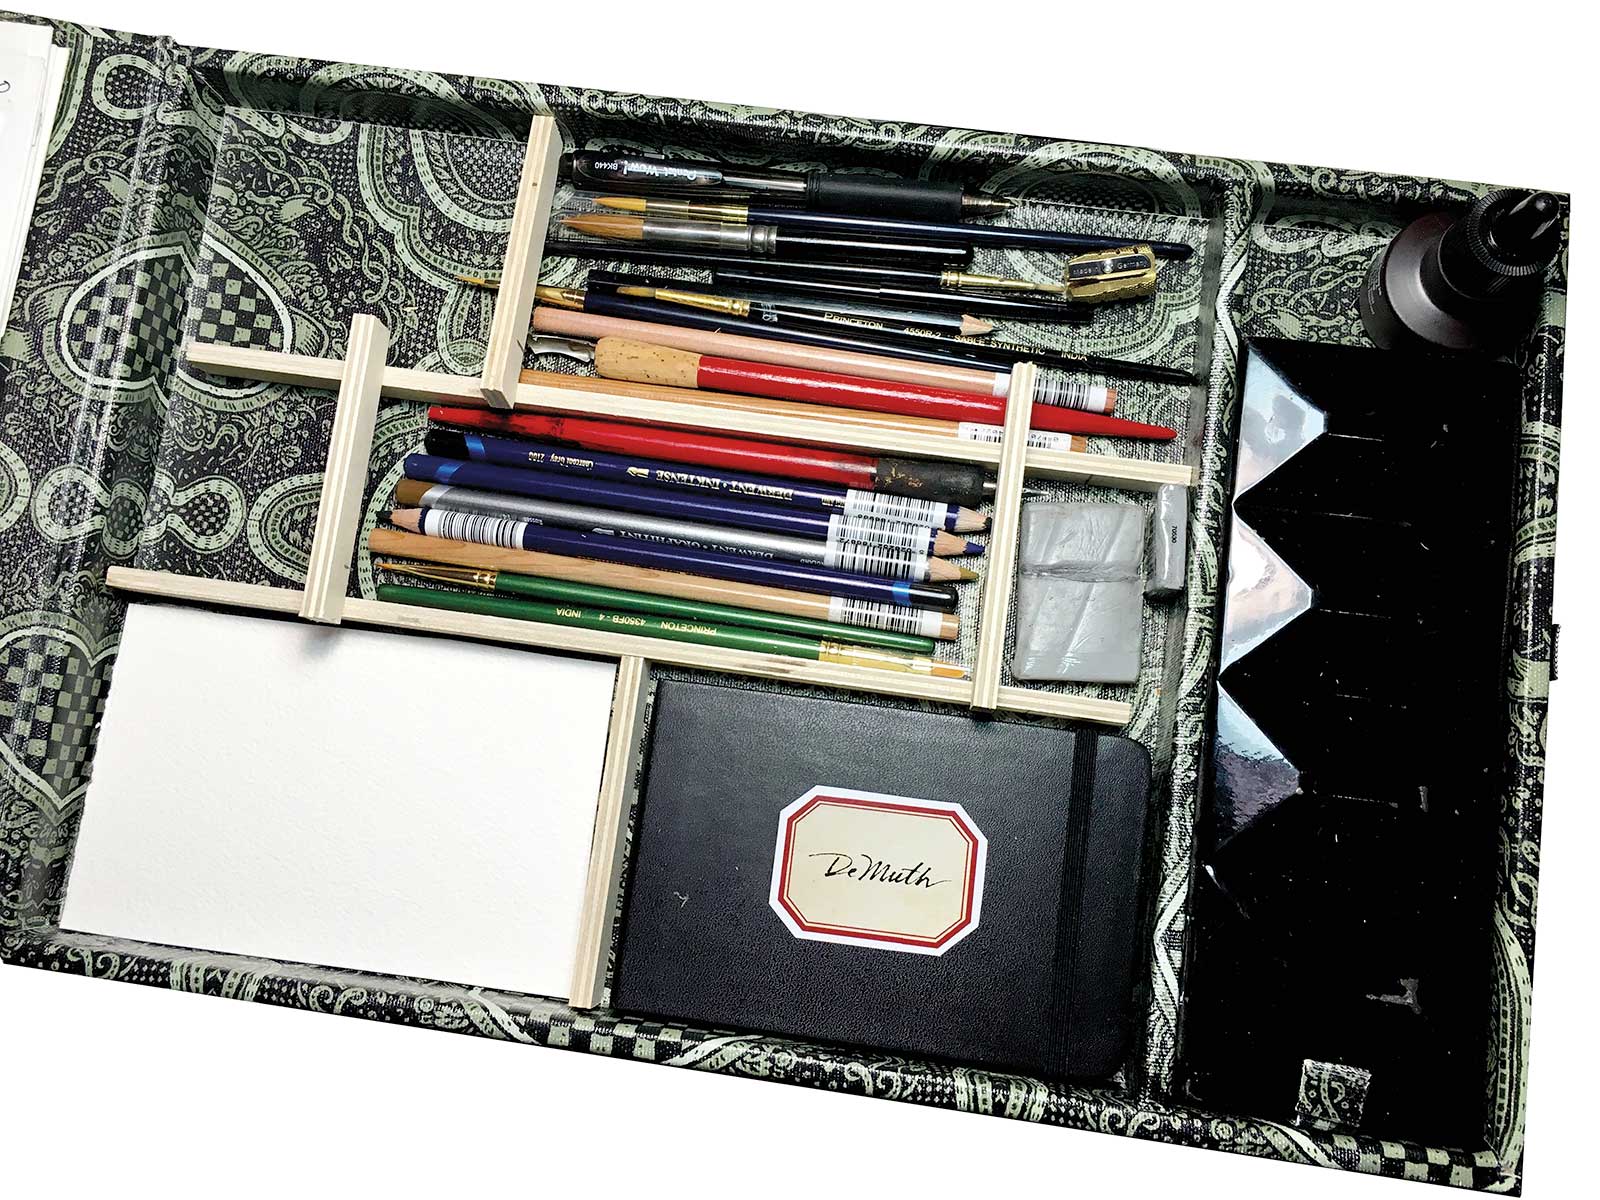
Finished Interior
The completed interior of the box. There are two water dishes in the top compartment, a stack of pencils, pens, dip pen holders, nibs, pencil sharpeners and erasers. On the bottom left are small pieces of watercolor paper, and a Moleskin sketchbook just to the right covered with the printed canvas.
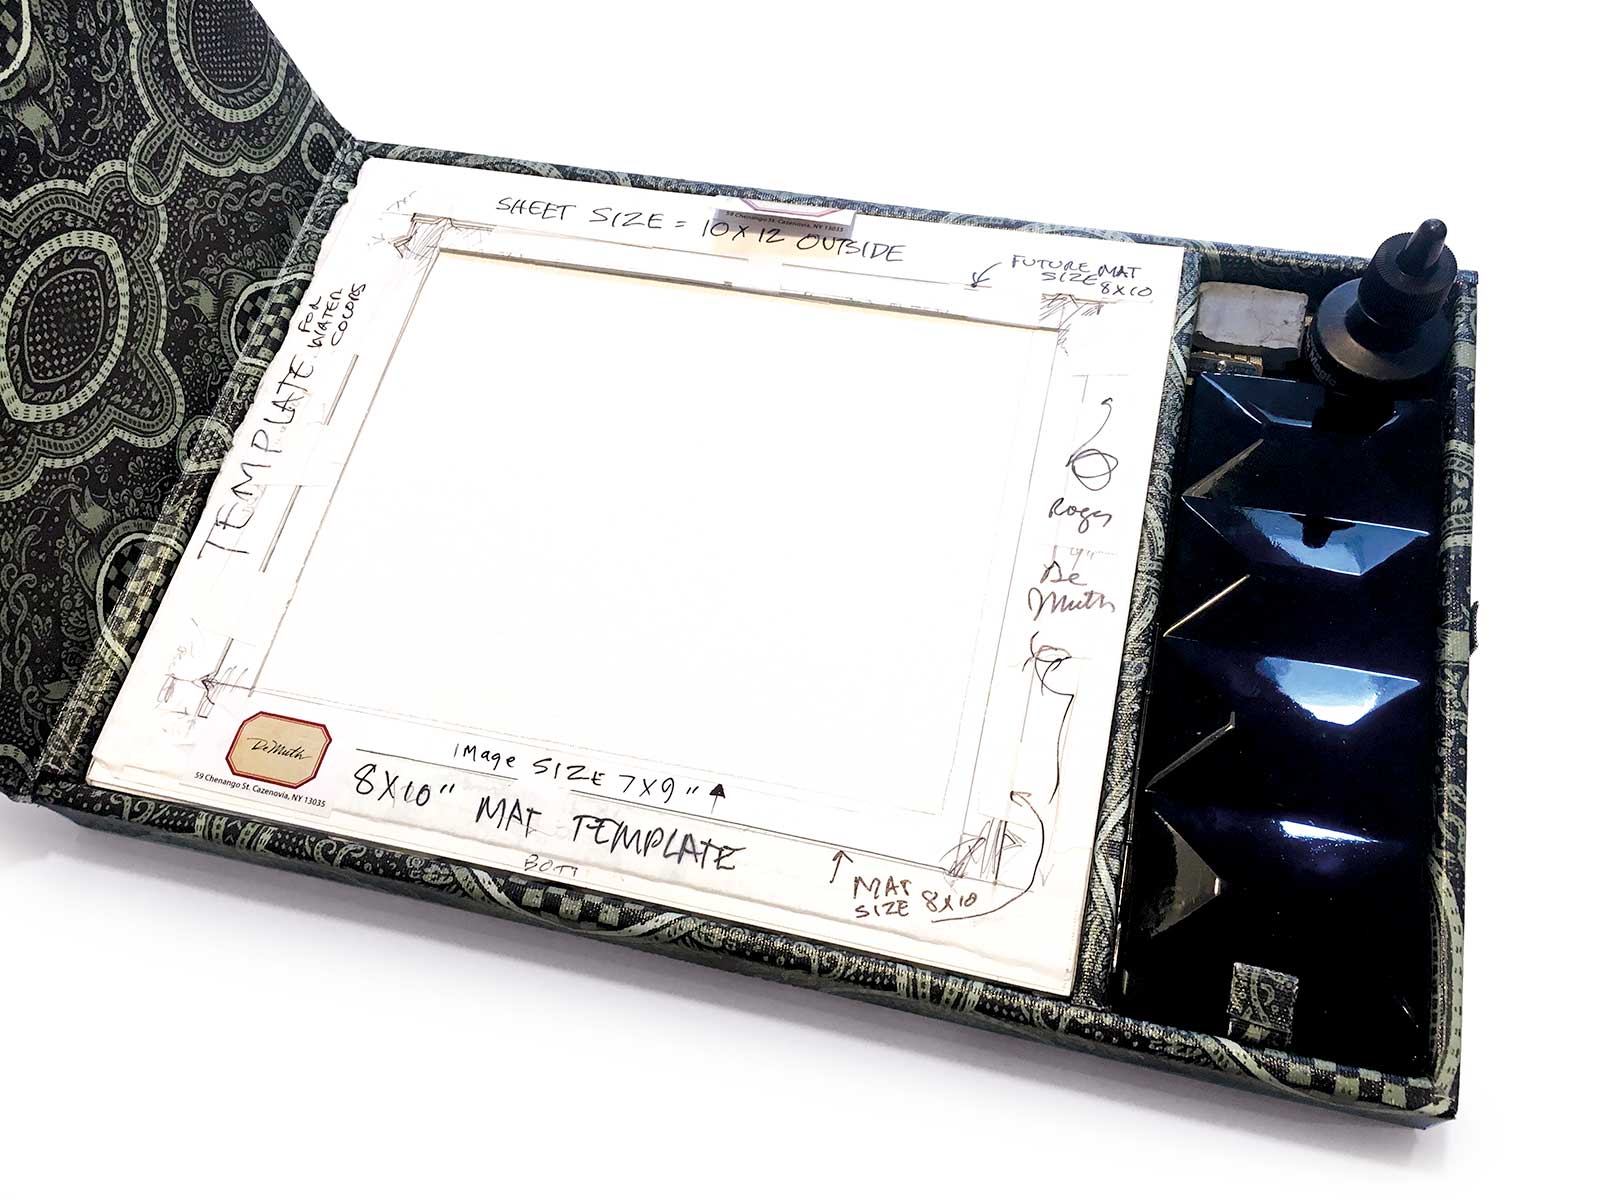
Outlining the Paper
I lightly draw a pencil outline on each sheet of paper I use. This way the image fits into a standard mat. The 8-by-10-inch paper template fits above the art tools area. I carry about six sheets of Arches 300lb watercolor paper in the box. A Winsor & Newton paint box on right lifts out easily with the pull tab below it.
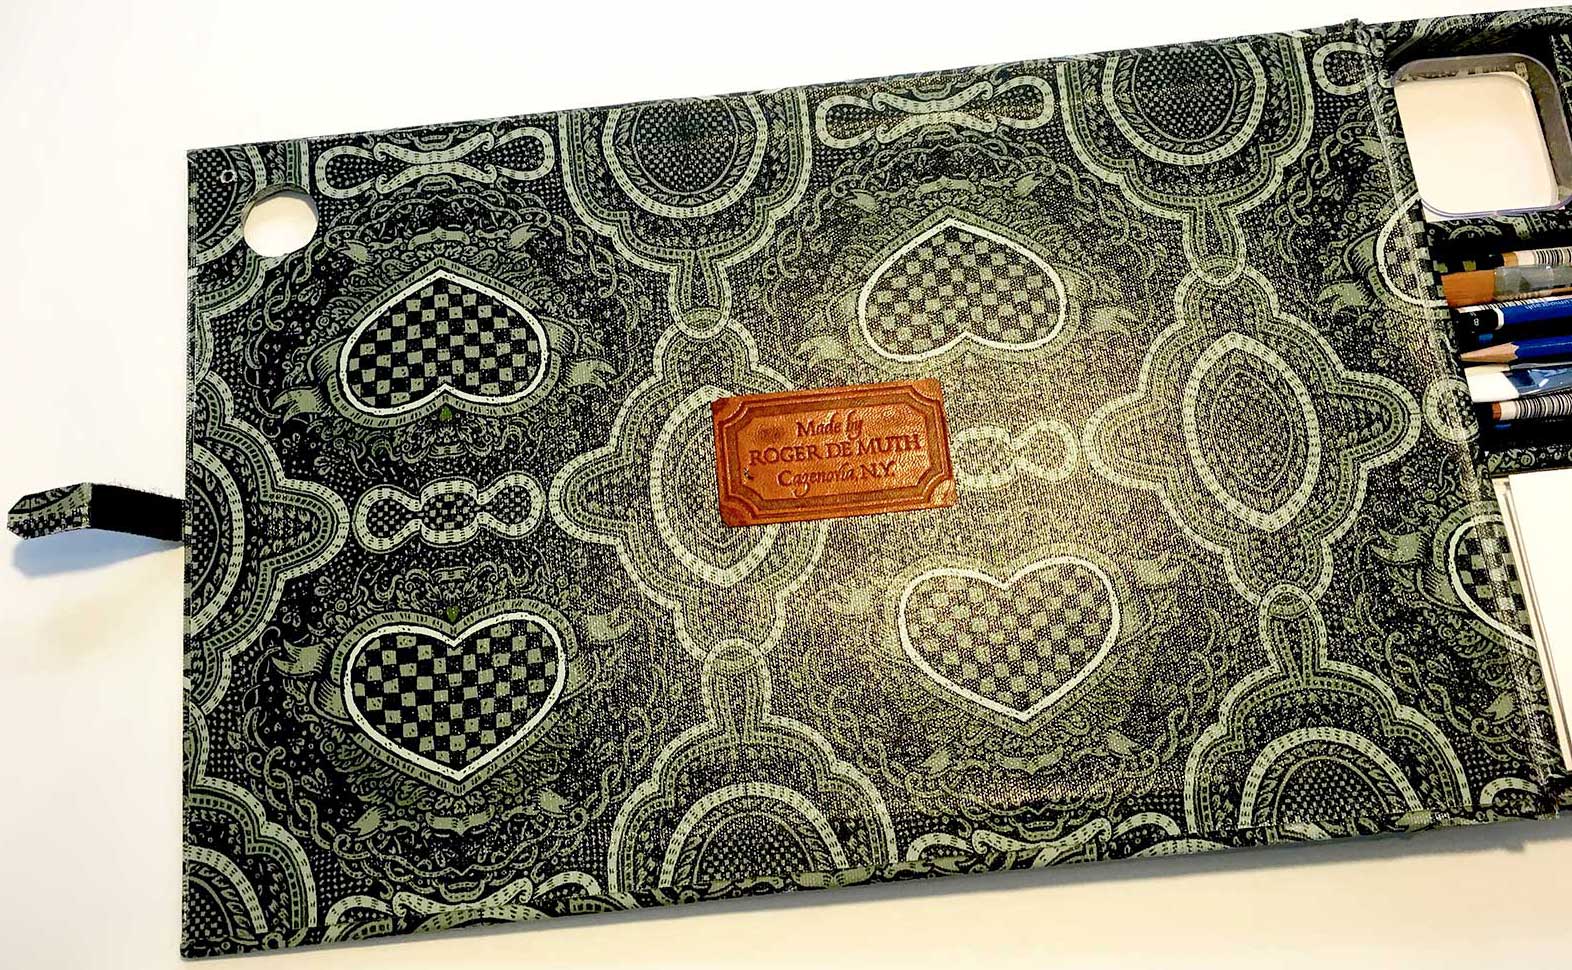
Inside Cover
The inside cover of the travel box with artist’s stamped leather label and hole for the inkwell to go through. I use waterproof ink and a dip pen to draw with, so having an ink well is quite handy. The inkwell can’t tip over easily, which is always a good thing.
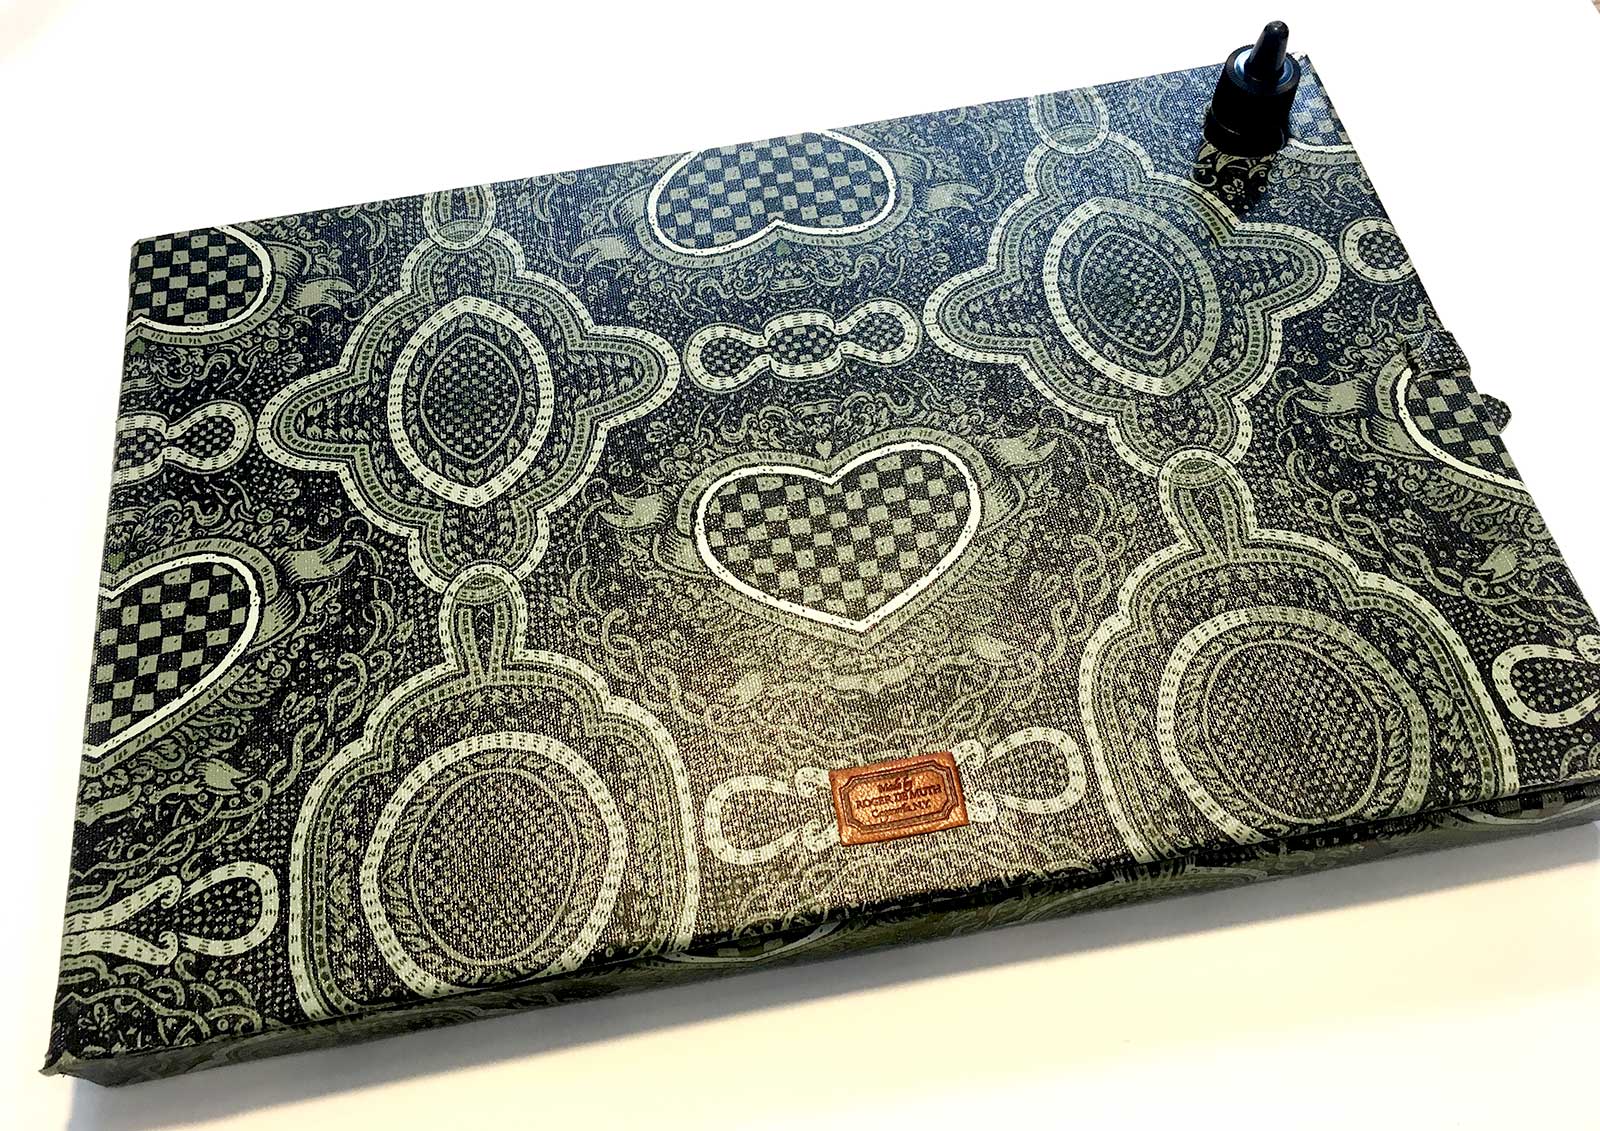
The Completed Box
I use small tabs of white artist’s tape to hold my drawings in place while I work on them. This way, I have a small work space to put on my lap or tray table on a plane. I use a dip pen frequently, and the rubber eye dropper stopper fits in a small hole next to the ink well.
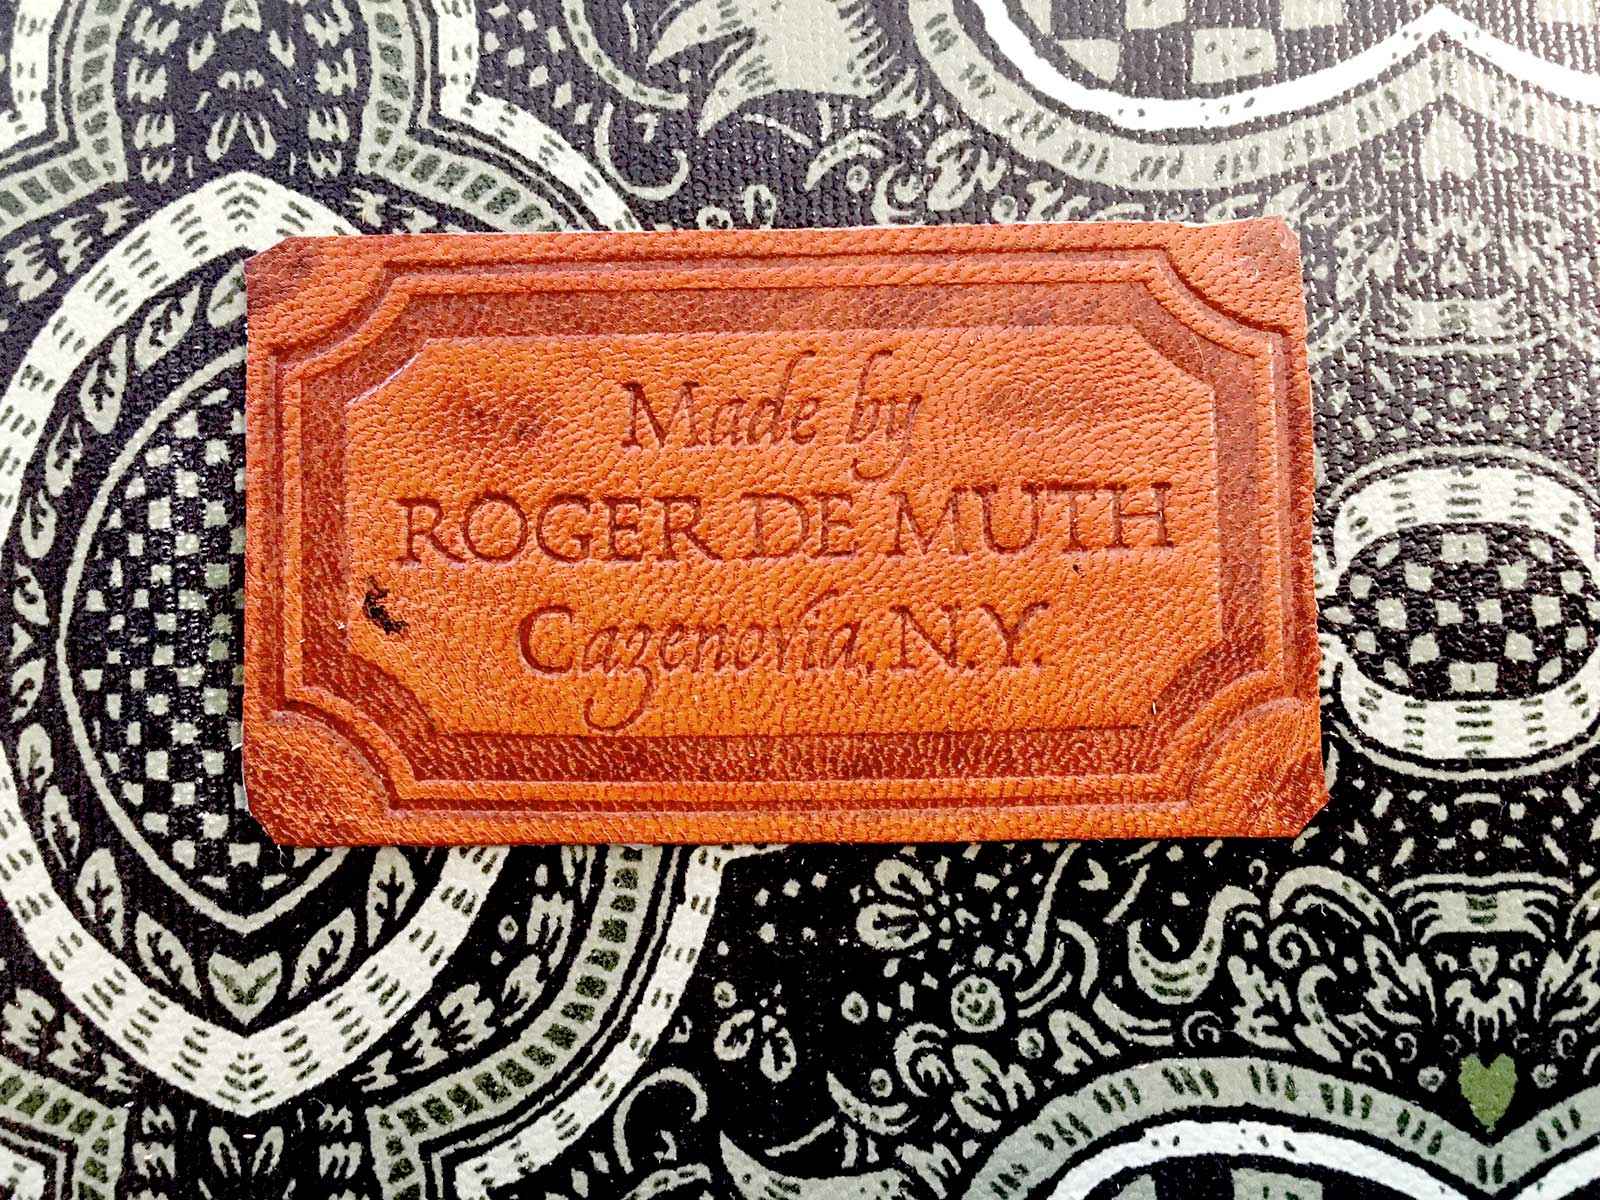
Stamped Leather Label
I had a magnesium stamp made for my stamped labels from Hodgins Engraving in Batavia, New York. I use leftover pieces of leather from my hand-bound books, wet the leather and press it into an old bookbinding stamping press overnight. To make labels like this, it’s important to use bookbinding leather, not garment leather. Garment leather is sprayed with a clear coating that makes it waterproof. Bookbinding leather is more pliable without the varnish, and the results speak for themselves.
About the Artist
 Roger De Muth
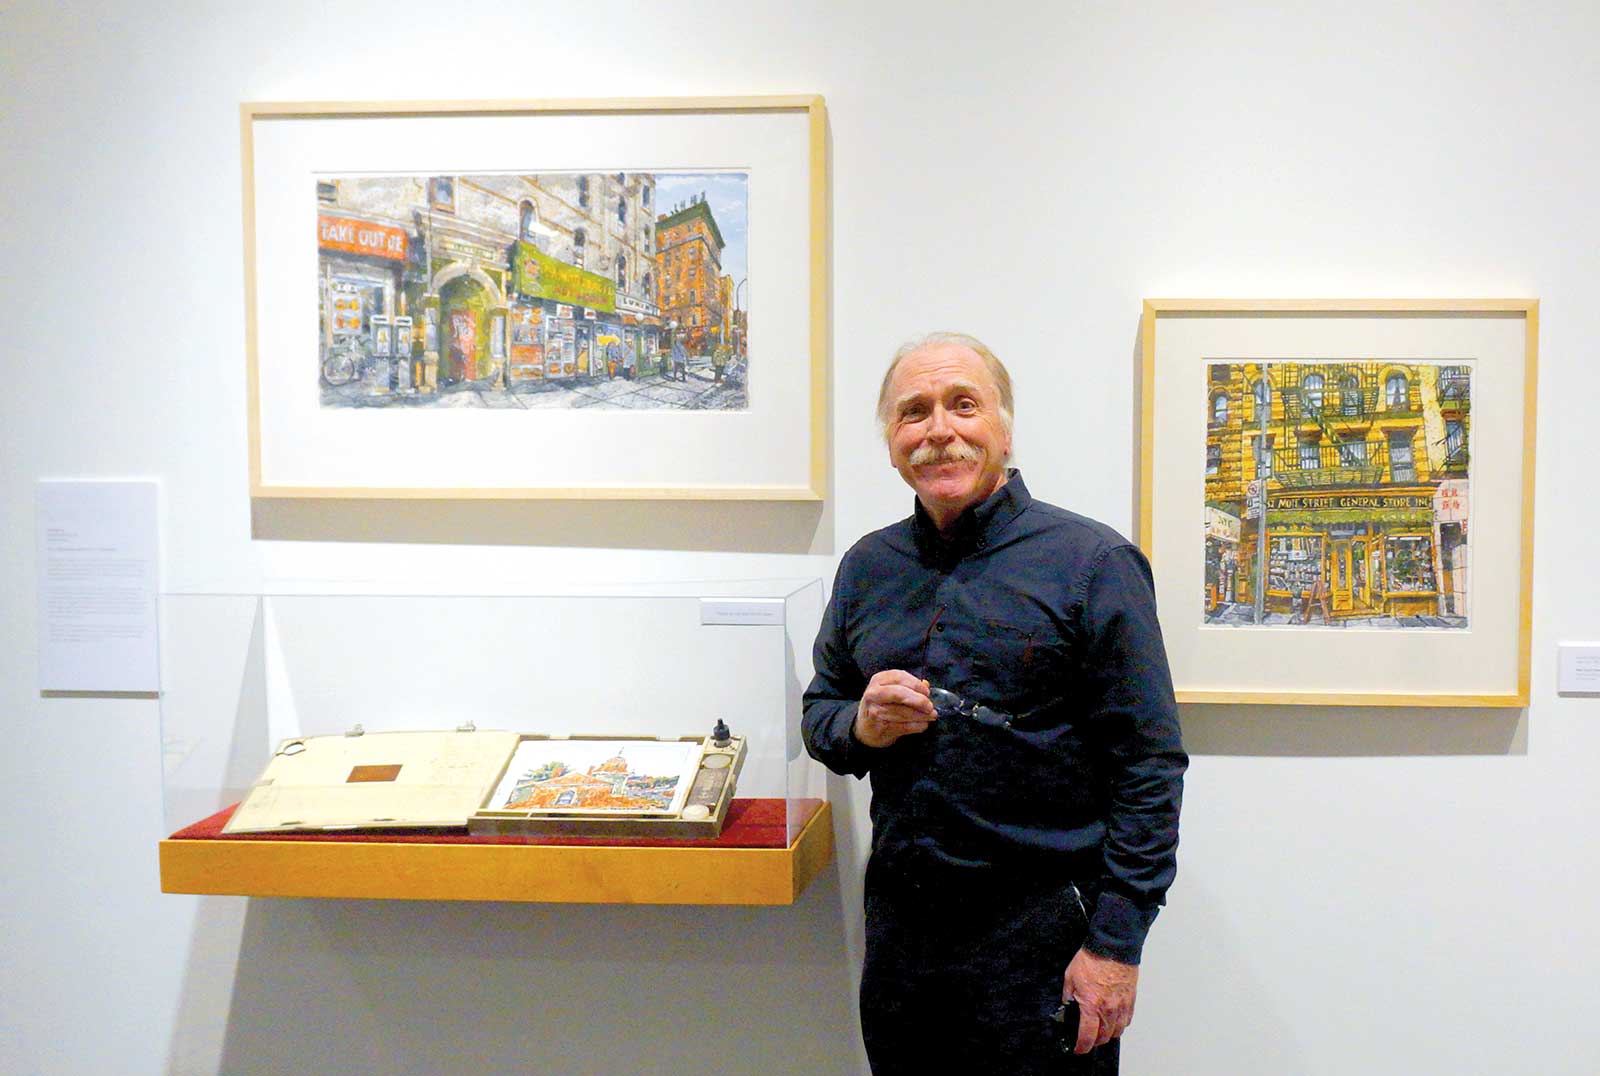
Roger De Muth is an award-winning designer, illustrator, photographer and gardener who lives in Cazenovia, New York. Among his awards are The Philadelphia Sketch Club, Publisher’s Weekly, and an Oppenheim Toy Book Award. Professor of Illustration at Syracuse University from 1979 to 2014, he has been the creative director of De Muth Design since 1970. De Muth was head of the Syracuse University Illustration Program 1998 to 2000 and organized the NYC Lubin House Senior Class Portfolio Open House annually for more than 20 years. He co-chaired the Syracuse Poster Project for 14 years and has lectured extensively to colleges, universities and community groups.
For more than 45 years, De Muth has been honored to work with major corporations throughout the United States and Europe, including Cartoon Network, Crackerjack, Masterpieces Puzzles, Smokey the Bear, Xerox, Silver Burnett and Ginn, Consolidated Edison, WGBH Boston, Kodak, Xerox, Big Blue Dot, Disney, Warner Brothers, the Syracuse International Film Festival and many more. In 2015 De Muth was awarded the Gold Medal from the Museum of Comic and Cartoon Art at the Society of Illustrators in New York City. His work has appeared in numerous exhibitions, including the Society of Illustrators in New York and Los Angeles. All three of his published children’s books have won awards. His most recent book is the captivating 134-page watercolor collection Have Watercolors, Will Travel. For more information, visit www.blurb.com/b/6075040-have-watercolors-will-travel.
Watercolor: www.rogerdemuthwatercolors.com
Design: www.rogerdemuthdesign.com